The course purchased this Toro Gang mower new in 1988. Originally it was used for fairway during grow in. For the last 20 years it has been our primary rough mower. We mow rough at least two times a week from April through September. It is responsible for cutting a lot of turf.
In the spring of 2013 our director of agronomy asked me if I could install an electric over hydraulic valve for raising and lowering the cutting units. Raising and lowering the cutting units has always been a cumbersome task. One has to actuate the valve on the tractor with one hand and reach behind the tractor with the other hand to actuate the valve for the cutting unit. Below is some pictures of the original valve. There are 5 spools in this valve. The center one operates number 1,2 and 3 cutting units. The one left of center operates number 5 cutting unit. Left of that is number 7. Right of center is number 4, then number 6.


I started the search for the valve on the internet. I found the Cross Company out of Greensboro, NC. They are a distributor for Walvoil valves. After talking to Walvoil we decide the valve we needed was model 18ES3(X5)/RC-SAE-12vdc. The valve came complete with solenoids. There is a solenoid on each side of the spool to make it bidirectional. I also ordered the Canfield connectors part # 5F6C4-000-HUOA from Cross Company. They are 12 feet long and connect to the solenoids.

Next I needed to make a control box. I turned to Mouser Electronics out of Mansfield, TX. They have everything electronic. With my Toro back ground I wanted to use Carling Switches. The switch I needed was a double pole double throw switch. It is momentary on, off, momentary on. I purchased all the electrical components from Mouser. If you would like a parts list please contact me.

Then I started the wiring process. The 2 white wires on the right side of the box are the main power. These wires went to the center tabs of the first switch. I used a short jumper to power the other switches. For all the wires coming in the box I used Heyco liquid tight cordgrips. Each spool on the valve has 2 solenoids, one for raising and one for lowering. The wires that come into the box in the bottom cordgrips are for the lower solenoids. The wires in the upper cordgrips go to the raise solenoids.

Here’s control box after it was finished

Here’s the wires connected to the lower solenoids.

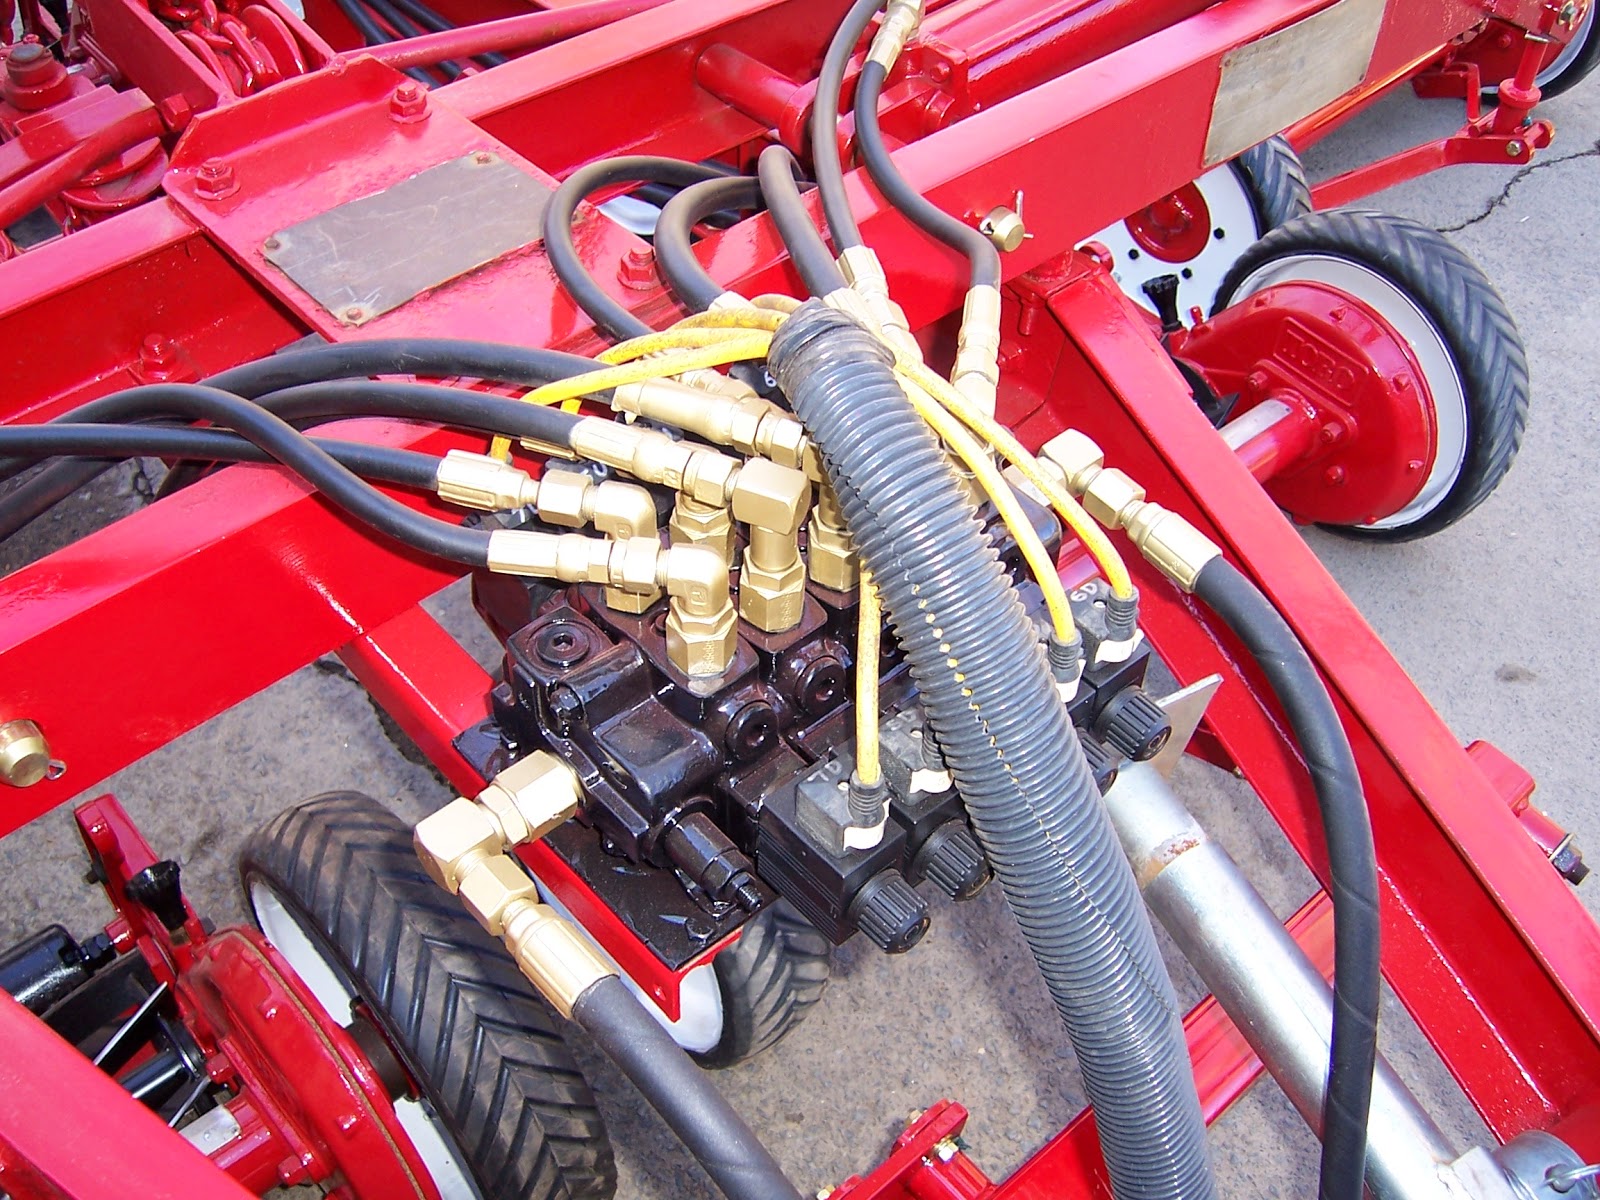
Now it was time to install the valve. I mounted the valve in it’s originally location. I had to fabricate a plate for the valve to rest on. It is slightly larger than the original plate. The original valve had -8 SAE ports. The new valve has -6 SAE ports. I ordered the adapters from Grainger.

Here’s the valve installed!


If you have any questions please contact me.