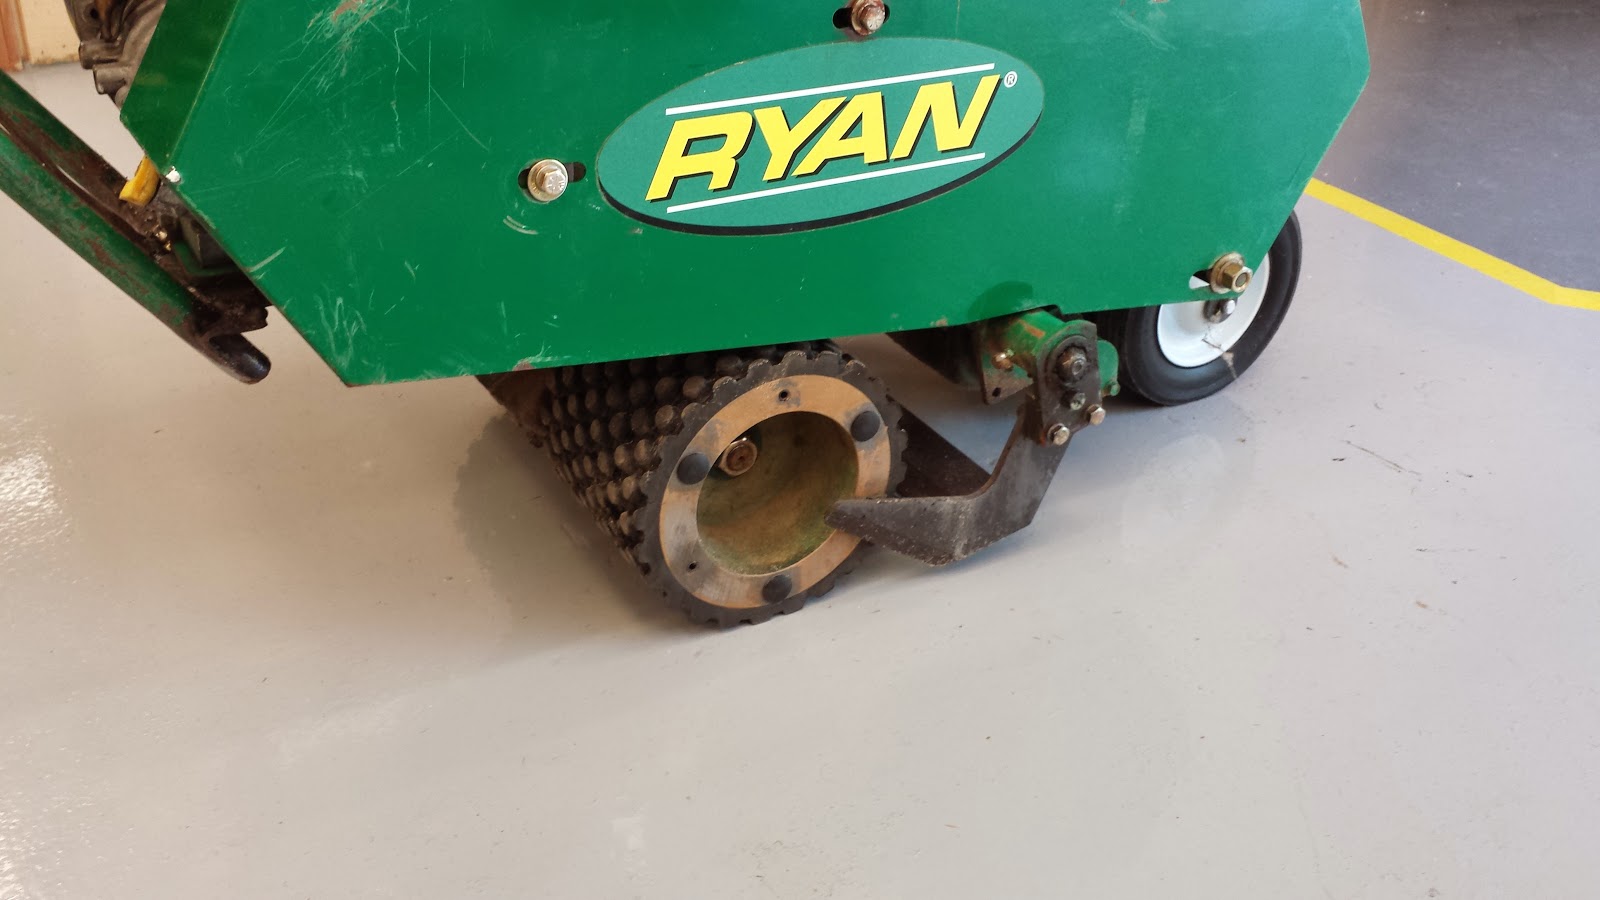
In Georgia we get a lot of 16″ sod. We have a Sod Cutter Jr. with a 18″ blade. Ryan offers a 16″ blade (p/n:4132716.7) for their heavy duty model. To make the blade fit the wheels have to be shortened and add a spacer to the blade mount.
I started by cutting off 1″ of the outside of each wheel. I used a 10″ horizontal band saw to make the cut.

After the wheels were cut, we decide to make them so they could be reattached for use with the 18″ blade. I sprayed blue layout fluid on the wheel to aid in seeing my scribe marks. I center punched each scribe mark to help center the drill bit. I drilled (6) 3’8″ holes 60 degrees apart in the middle of the cast iron. When drilling I always start with a small bit and work my way up to the final diameter.

I lined up the 1″ section of the wheel to the large section. Then I used a 3/8″ transfer punch to mark the holes in the large section.
![]()
I drilled 3 holes 120 degrees apart with a 3/8″ bit and the other 3 holes with a 5/16″. The 5/16″ holes were tapped with a 3/8″-16 tap. In the picture below I installed setscrews in the tapped holes and plastic rivets in the 3/8″ holes to keep dirt out.

I used a piloted counter bore to recess the holes for the socket head cap screws.


I center punched the 3/8″ stainless rod so it would stay in the 1″ section of the wheel. I also used red loctite on the rods to prevent them from coming out.


I made (2) 1/2″ spaces to go on both sides of the blade. I used a piece of 1/2″ X 2″ flat bar cut 1-1/2″ long. I used a 5/16″ transfer punch to mark the holes using the blade as a guide.

I also added 2 extra wheels to the rear to aid in stability. I used 1/2″ round bar for the axle and washers to space the wheels a part. I cut the axle to length and drilled a 1/8″ hole in each end. I installed cotter keys to keep the wheels in place.

Here’s the finished product.

